How to Install the
Slimline 100
Suitable for builders, awning contractors and confident DIY installers
Your Slimline 100 arrives fully assembled and ready to fit. The brackets are already inside the side frames — no on-site cutting or fabrication required. Follow these steps to mount and seal your awning correctly.
Understanding your awning brackets
Your Slimline 100 arrives fully assembled and ready to fit, with the brackets already slid inside the side frames. Depending on the size of your awning you will have either a 2 bracket system (left and right) or a 3 bracket system (left, right and centre). When you unpack the awning you will be able to see which system you have.
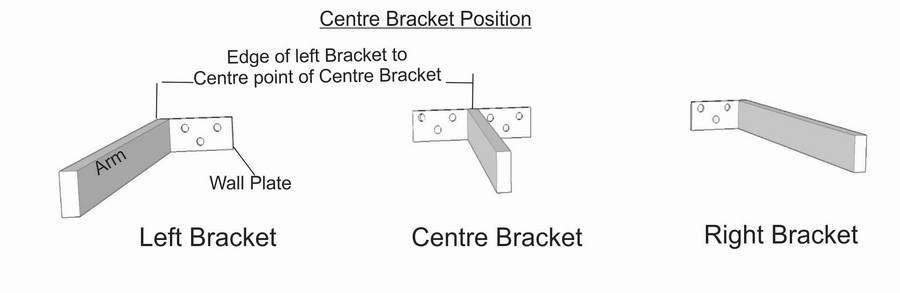
The brackets — parts and function
Each bracket is a single welded unit made up of the wall plate and the arm.
The wall plate fixes directly to the wall. The arm is welded to the wall plate and projects outward, sliding inside the side frame of the awning.
The arm is slightly pitched downward — this creates the forward slope that directs water off the front of the awning.
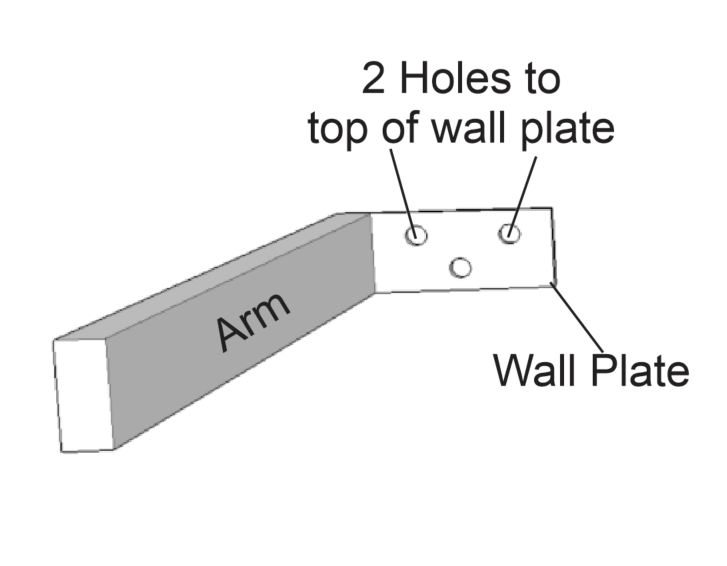
Identifying left from right
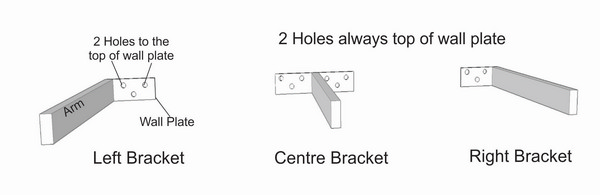
Look at the wall plate. The two holes are always at the top — this tells you which way the bracket is oriented and ensures the arm pitches correctly for water runoff.
- Left bracket — wall plate faces right toward the centre.
- Right bracket — wall plate faces left toward the centre.
How to measure for awning bracket spacing
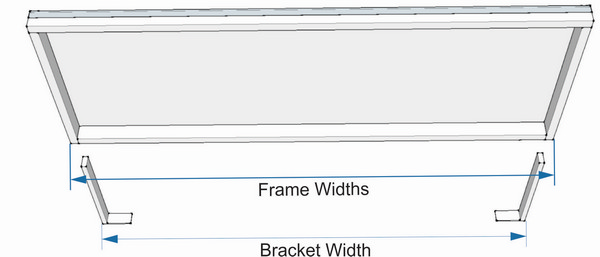
Decide where the awning will be mounted. Measure the outside width of the 100×50mm aluminium box frame.
Do not include the angles or capping that secure the polycarbonate sheet.This is your Frame Width.
Now subtract 10mm from the Frame Width. The result is your Bracket Width — the measurement between the outer edges of the two wall-mounted brackets.
How to fix awning brackets to the wall
Fixing the left bracket to the wall first
Mount the left bracket first, making sure the wall plate faces toward the centre. Use a spirit level to confirm it is level and square to the wall.
If the wall surface is uneven, you may need to use packers to achieve a secure and even fit.Fixing the right bracket to the wall
Measure from the outside edge of the left bracket to mark the correct position for the right bracket, based on your calculated Bracket Width.
Mount the right bracket, again checking that it is level, square, and aligned with the left bracket.
⚠ Take all measurements from the wall plate as close to the wall as possible.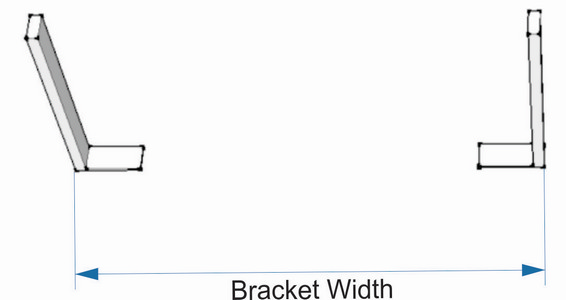
If you have a 3 bracket system, fit the centre bracket after the left and right brackets are mounted.
Measure the outside width of the 100×50mm aluminium box frame.
Do not include the angles or capping that secure the polycarbonate sheet.Measure from the outer edge of the left side frame to the centre of the centre frame. Subtract 5mm — this gives you the Centre Bracket Position.

Mark that measurement on the wall from the outside edge of the left bracket. Mount the centre bracket at that point.
- Mark the Centre Bracket Position on the wall.
- Mount the centre bracket at that mark.
- Measure from both the left and right side frames to confirm the position before final fixing.
How to fit your awning to the wall
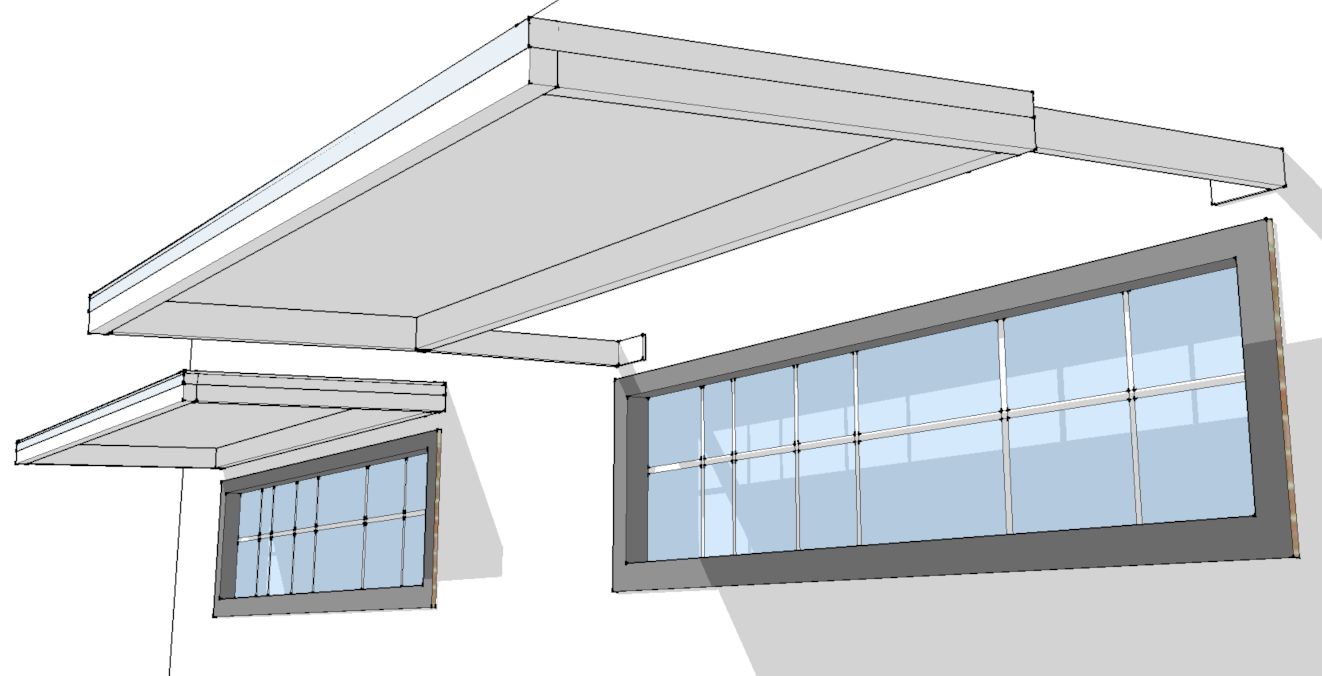
Slide the awning over the brackets by inserting each bracket into the side frame channels.
The easiest way is to set one bracket into the frame first, then slide the next bracket into the frame.Setting the pitch for water runoff
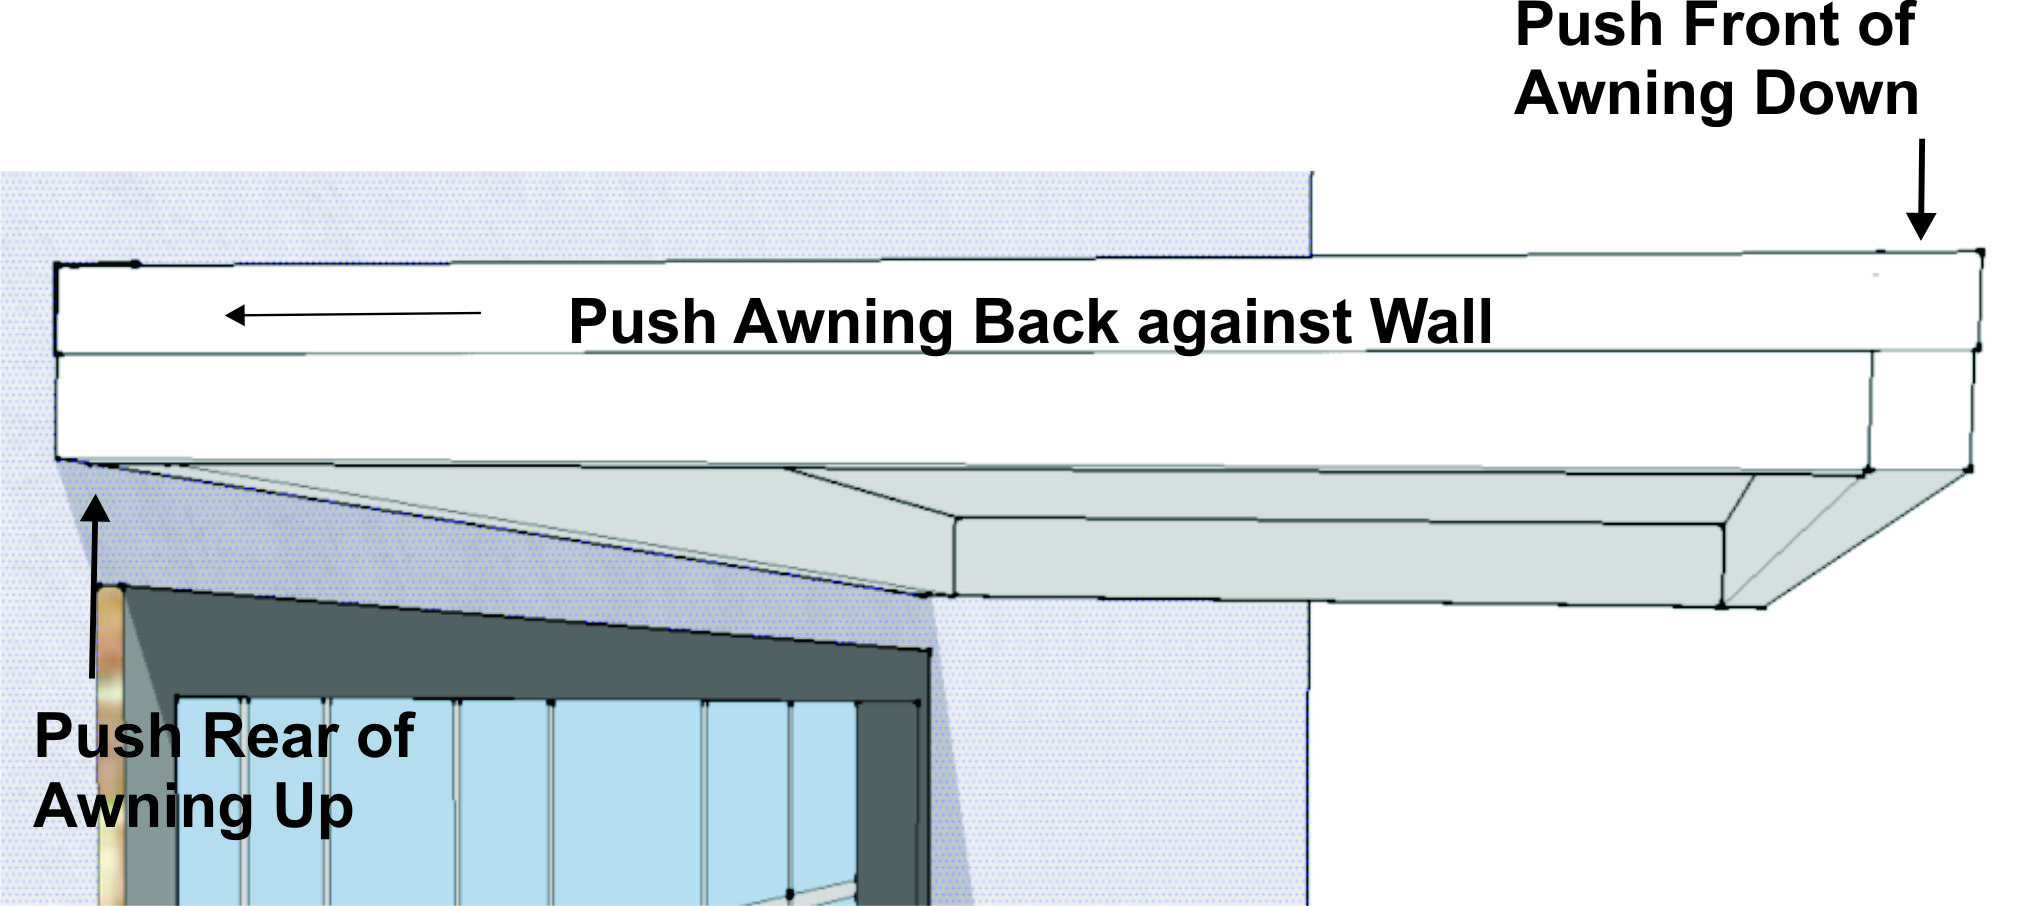
Push the rear of the awning up and tilt the front downward so water runs off the front. Push the awning back against the wall to hold the position.
You can also control which side the water drips from by slightly raising one side at the front.
- To drip left — raise the right side slightly at the front.
- To drip right — raise the left side slightly at the front.
- To drip centre — place a spirit level across the front and set it dead level side to side.
Securing your awning to the brackets
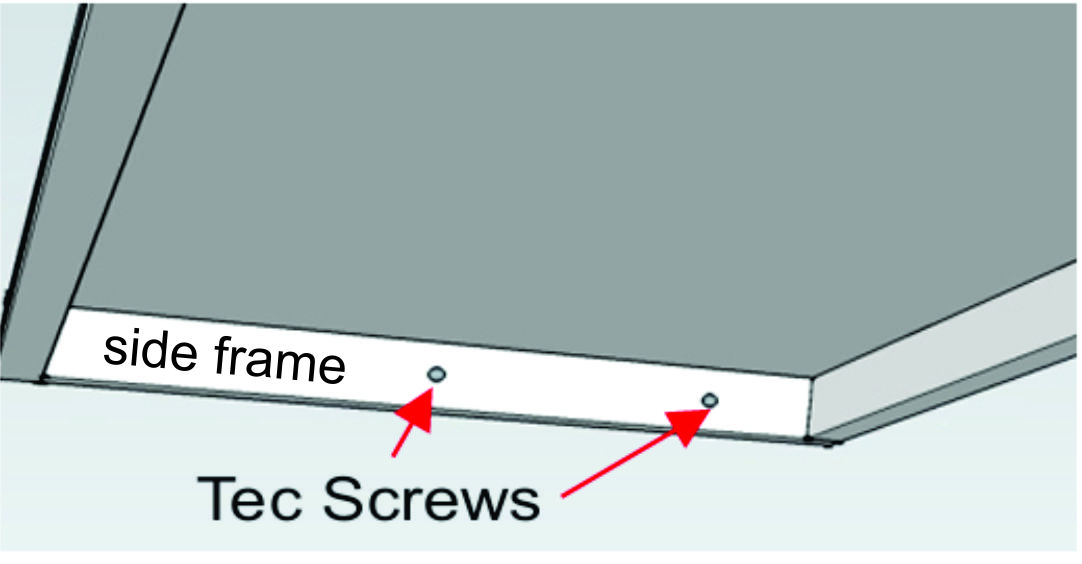
Once the pitch is set and the awning is back against the wall, secure it by driving 2 Tek screws into each side frame — through the frame and into the bracket inside.
- 2 Tek screws per side — 4 total.
- Drive through the side frame into the bracket.
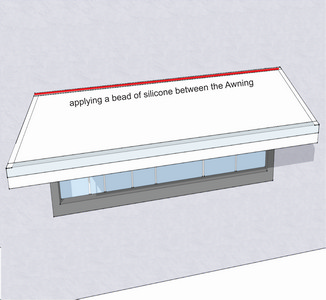
How to seal an awning to a brick wall
Finish the installation by applying a continuous bead of silicone along the joint between the rear of the awning and the wall surface.
Angle the nozzle so the silicone is forced into the gap between the awning and the wall rather than sitting on the surface. Silicone performs best when bonded between two surfaces under slight compression.
- Use exterior-grade silicone.
- Apply in one continuous bead with no gaps.
- Tool smooth with a wet finger or silicone tool.
- Allow to fully cure before exposure to rain.
Custom-made in Sydney — supply your measurements and we'll build it ready to fit.
Get a Quote or call 0405 533 839 Back to Slimline 100