Custom-Made Sliding Louvres for Privacy, Airflow and Shade
Sliding Louvres
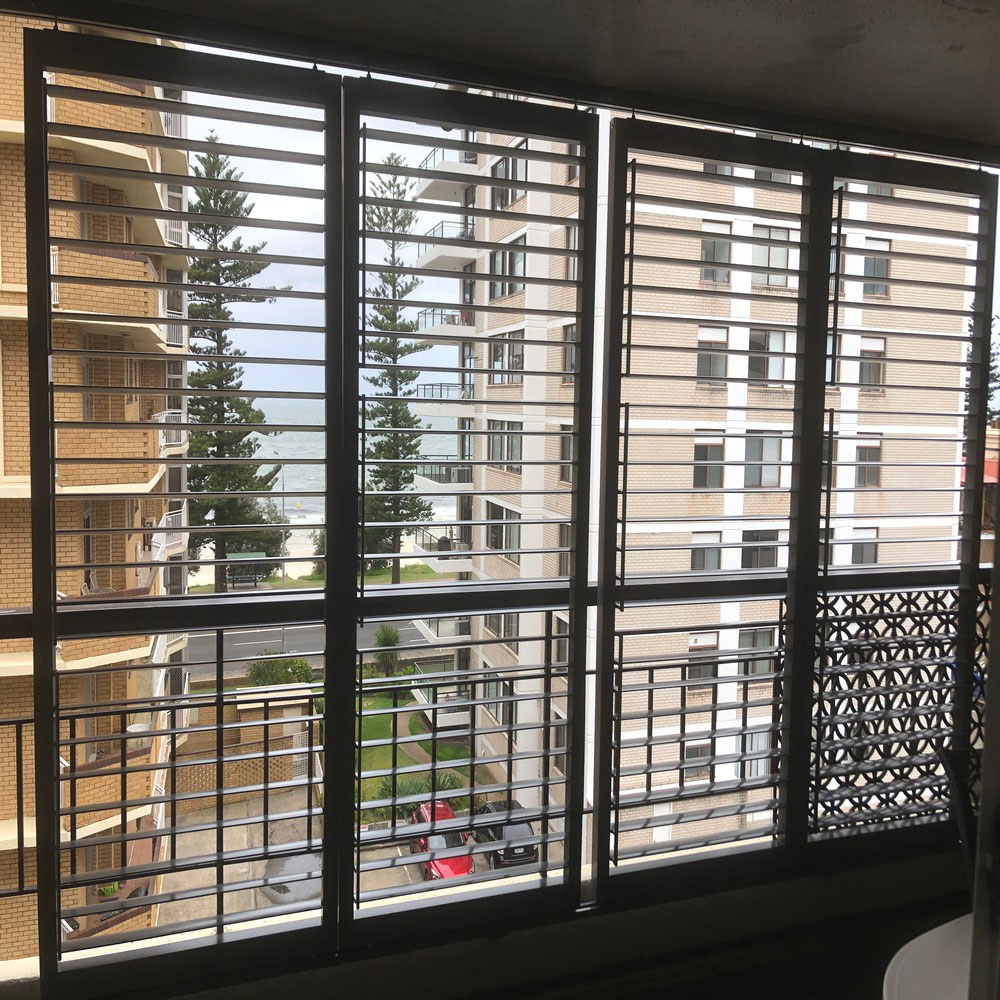
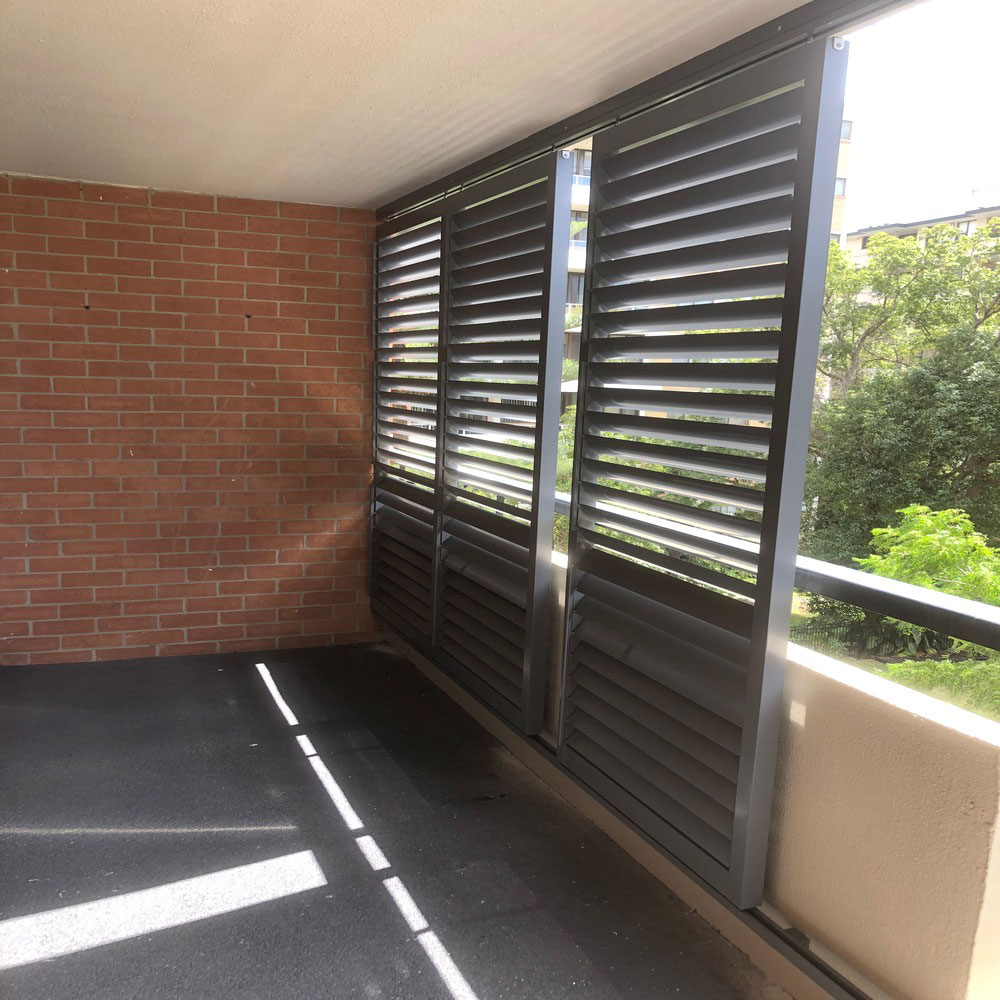
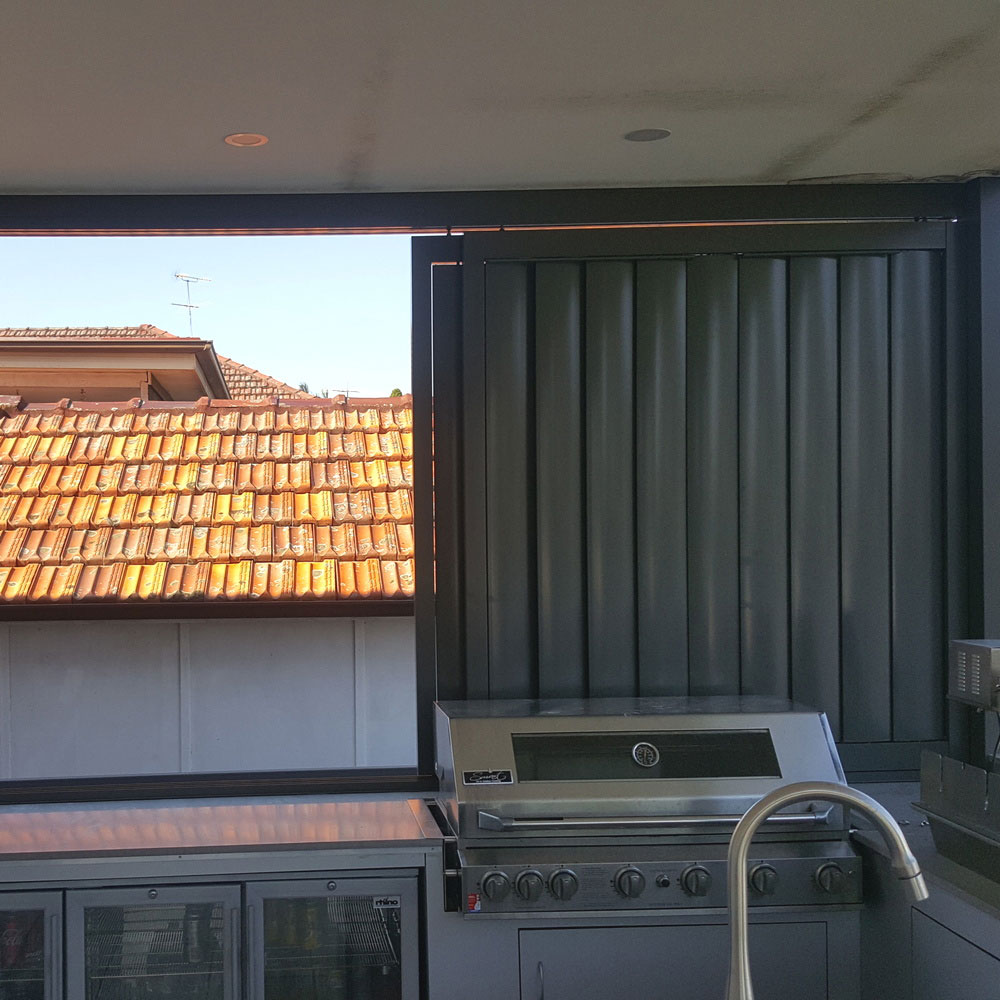
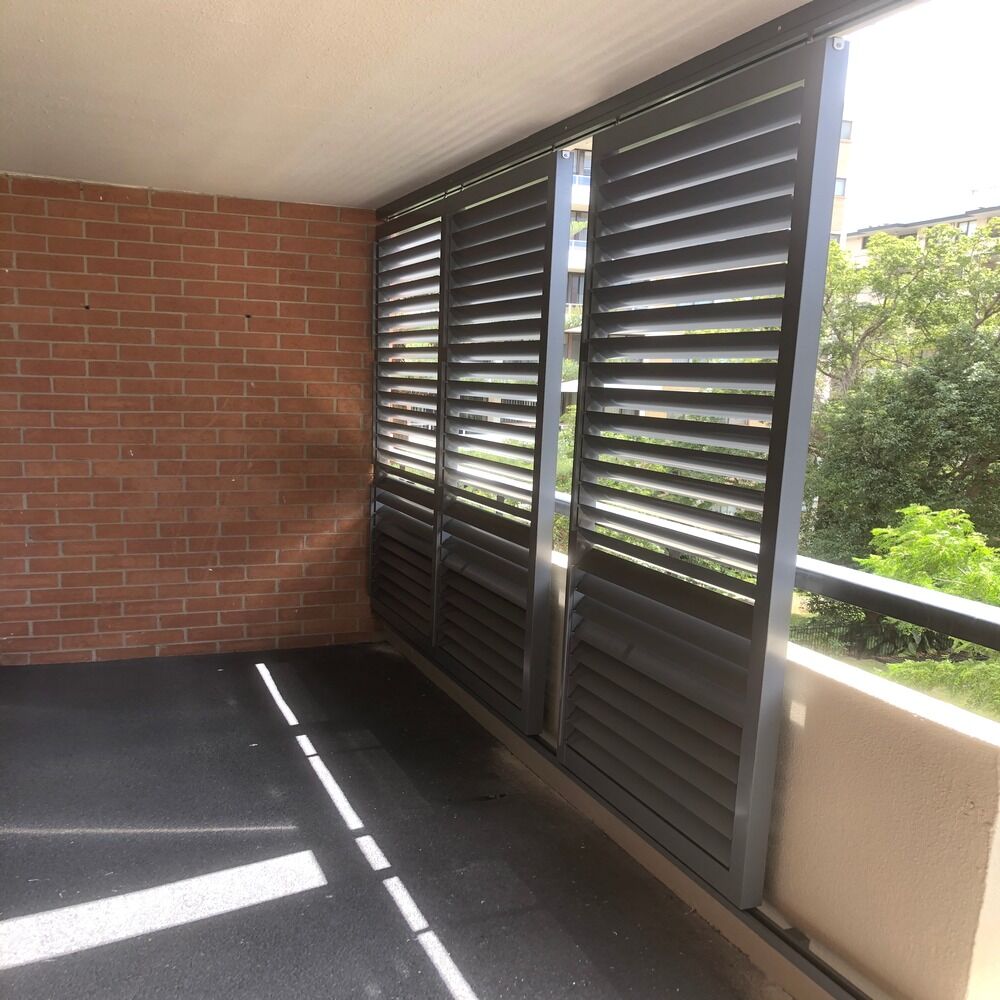
Sliding Louvres offer a sleek, flexible solution for privacy, sun control, and architectural appeal. Panels are top-hung on aluminium tracks with stainless steel running wheels and a bottom guide for smooth, unobstructed movement. Suitable for balconies, patios, facades, or breezeways, the system is fully customisable — with multiple panel layouts, track combinations, and blade orientations to suit any project.
Fully Aluminium Construction
Lightweight, rust-free, and highly durable — finished in your choice of premium powder-coated colours to suit any architectural style.
Smooth-Sliding, Multi-Track Design
Top-hung panels glide effortlessly on stainless steel runners, with as many tracks as your layout requires.
Customisable for Any Layout
Designed to suit patios, balconies, breezeways, facades, and full-height walls — all components are fabricated to your site’s specific needs.
Blade and Orientation Options
Choose adjustable or fixed blades in horizontal or vertical orientation to suit sun control, privacy, or airflow requirements.
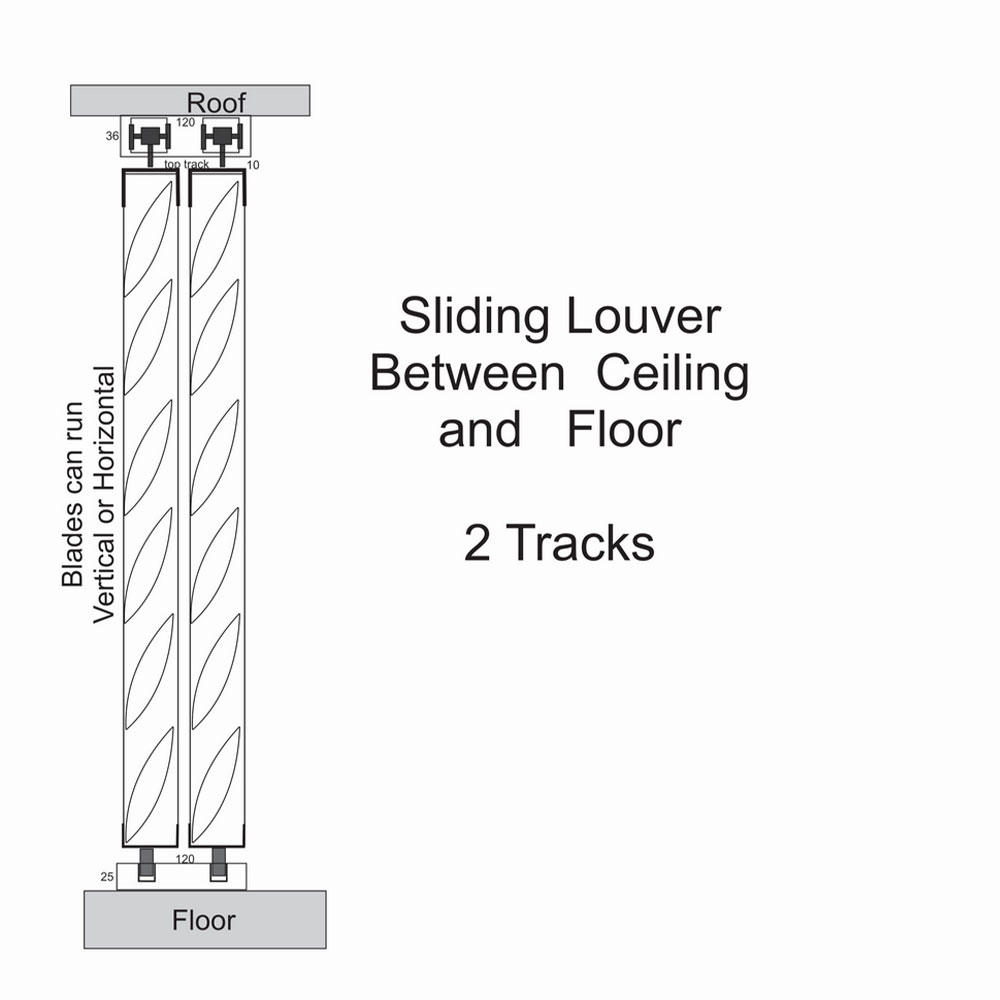
Top-Hung System with Bottom Guide
Clean, floor-friendly design allows panels to slide freely over decks, tiles, or concrete without obstruction.
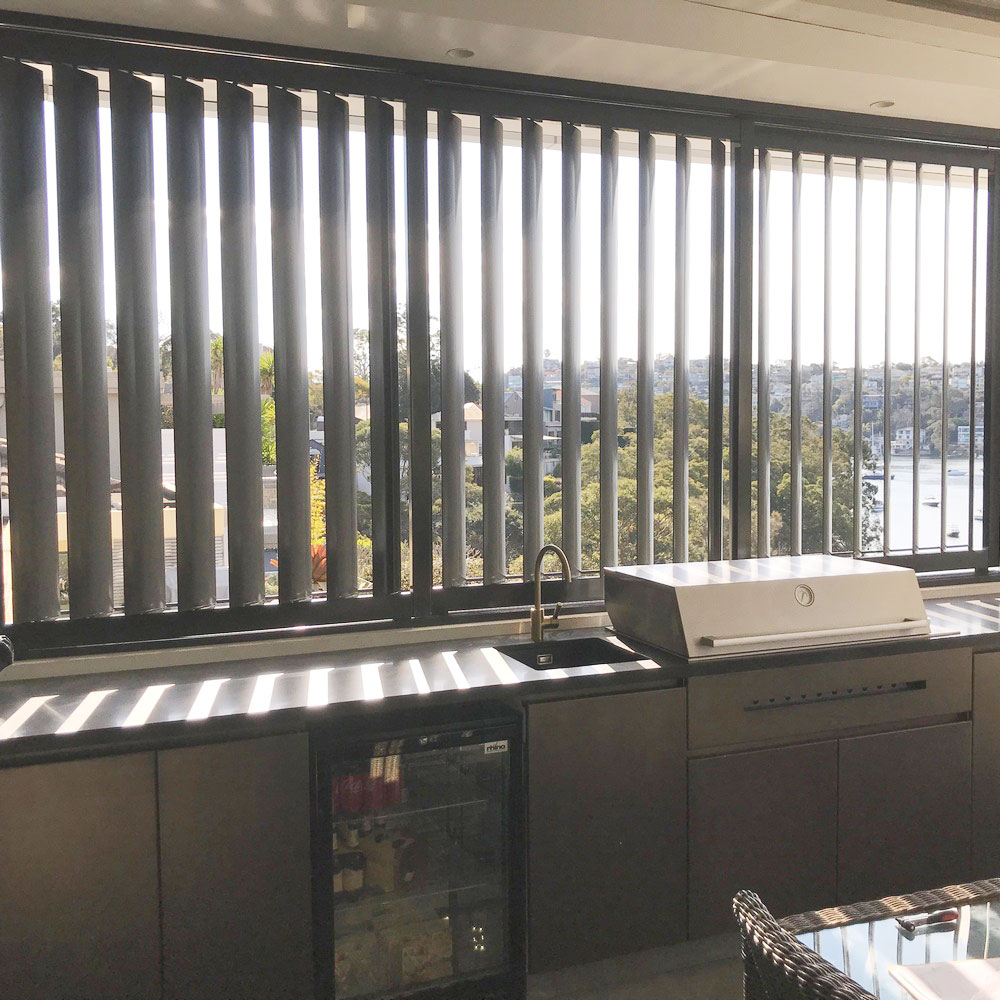
Sliding Louvres
Gallery
Sliding Louvres
Frame & Fixing Details
The Sliding Louvres system is built from durable aluminium with a top-hung track and bottom guide for smooth, unobstructed movement. Tracks are fixed to structural framing and can be configured with multiple panels and orientations.
Whether using 85mm or 160mm blades, the system is fully customisable to suit your space, with options for adjustable or fixed blades and multiple panels sliding on a single or multi-track layout.
Installation Details
Designing Your Sliding Louvres Layout
The first and most important step is knowing where and how the system will be fixed. The Sliding Louvres are supported entirely from the top, so the overhead structure must be strong enough to carry the full weight of the panels. Accurate measurements and planning are essential for a smooth, functional system.
To design your layout, we need the following:
- Opening width and height – the total area to be covered.
- Available depth for tracks – this determines how many tracks can be installed.
- Surfaces must be level – both ceiling and floor must be level to ensure smooth sliding and proper panel alignment.
Once these details are confirmed, we can calculate the number of panels and tracks that will work best for your space.
Example layout:
If you have a 4000mm wide x 2000mm high opening and 220mm of available track depth (suitable for 4 tracks using 85mm blades), you could have:
- 4 tracks with 1 panel per track, each panel 1000mm wide. All four panels can slide individually to one side, leaving up to ¾ of the opening fully clear.
- 2 tracks with 2 panels per track, allowing the panels to stack to one side or split to either side, creating a central clear opening.
The system is highly adaptable. Depending on your site conditions and design preference, we can configure panels to stack left, right, centre-split, or overlap — all fully customised to suit your layout.
Installation Examples
- Floor-to-Ceiling Fixing
In this setup, panels are fixed between a structural ceiling and floor. The top track is secured to overhead framing, while the bottom guide is installed directly to the floor. This is a common layout for full-height privacy screens or outdoor room dividers. - Side-Fixed System
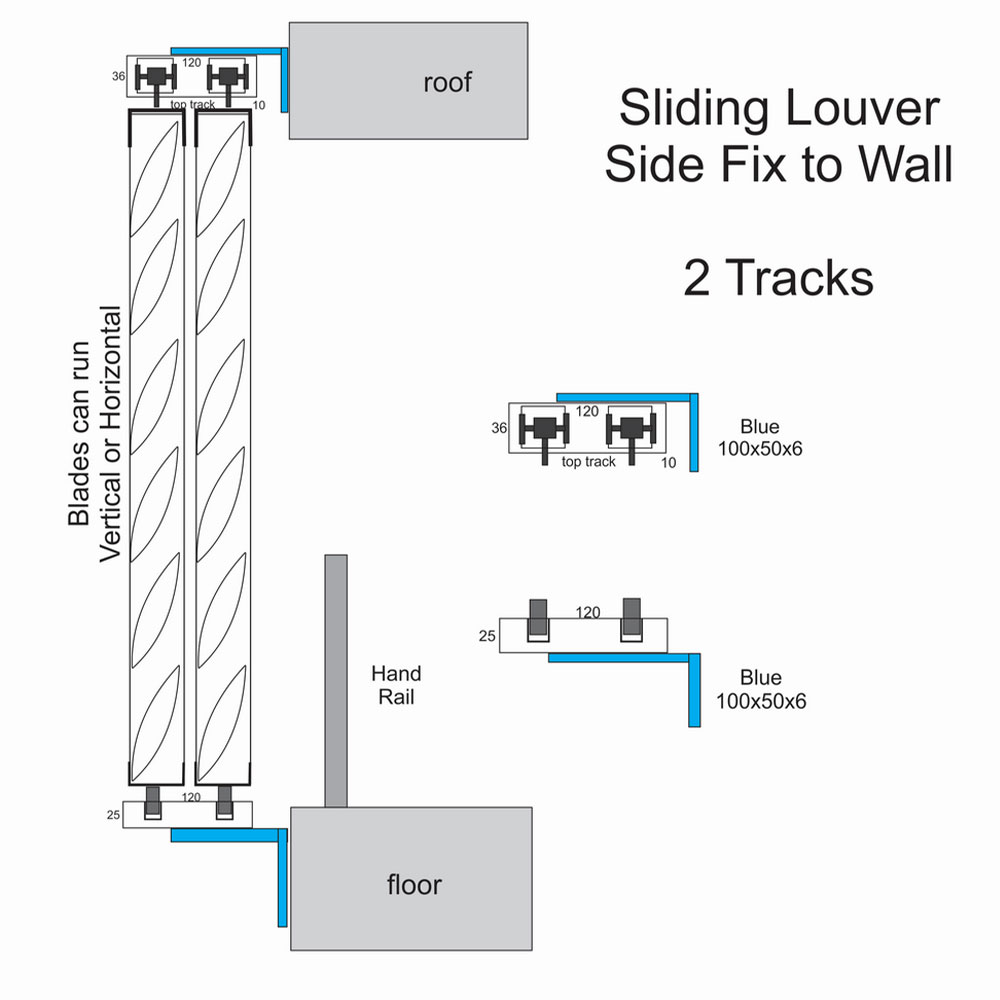
The Louvre system is mounted to the side face of the wall, rather than inside an opening. This option is used when there’s no room within the opening, or when obstructions like windows or handrails prevent internal mounting. Fixing to the outside of the structure makes it ideal for balconies, building facades, or retrofit installations. - Top View – Two Panels on Two Tracks
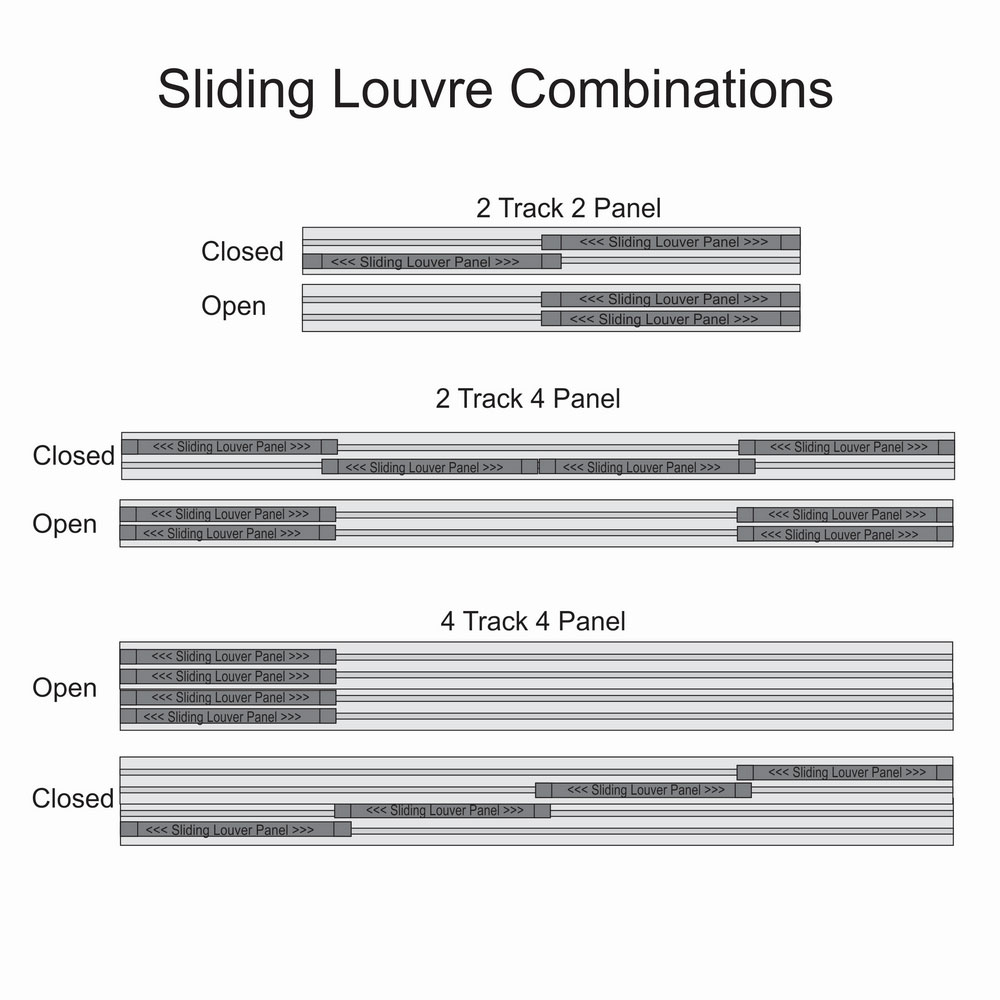
A simple configuration showing two individual panels, each on its own track. This setup allows each panel to slide freely and stack to one side, providing easy access and partial opening. When closed, the two panels cover the full width of the opening. It’s a practical solution for smaller spaces, doorways, or where minimal screening is required. - Top View – Four Panels on Two Tracks
In this layout, two panels share each track — offering a more compact solution for wider openings. The panels can be stacked to one end or centre-split for symmetrical opening. This setup balances coverage and flexibility, making it ideal for outdoor entertaining areas, patios, or facades where wider spans are needed but space is limited for additional tracks. - Top View – Four Panels on Four Tracks
In this setup, each panel slides independently on its own track. All panels can be pushed to one side, leaving ¾ of the opening completely open, or spaced evenly across the span to fully enclose the area. This layout offers the most flexibility and ease of use, perfect for wide installations that require maximum clearance. - Slide-Behind-Wall System.
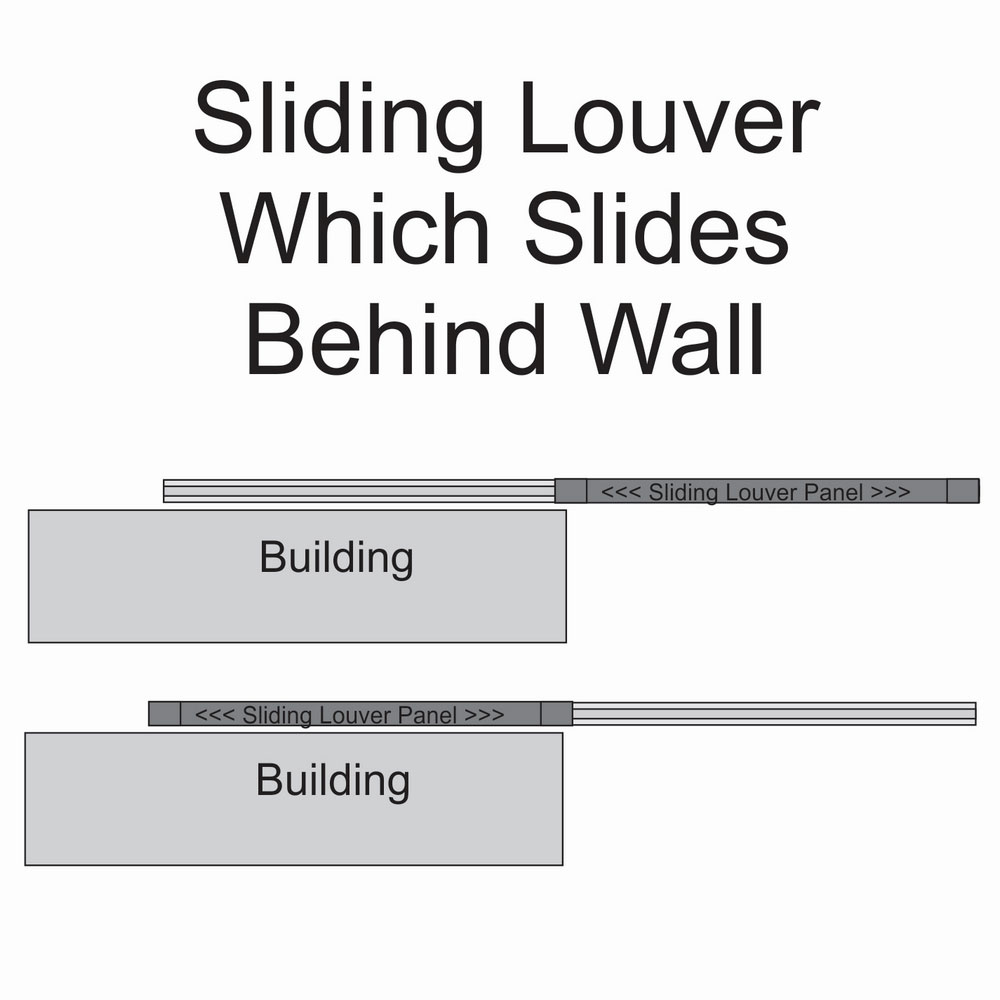
This layout allows the sliding louvre panels to move completely behind a side wall, making them virtually invisible when open. It’s an excellent option for achieving a clean, open space without visual clutter. As long as there are no obstructions like handrails or downpipes on the return wall, the entire system can be mounted externally. When closed, the louvres provide full coverage and privacy; when open, they slide neatly out of sight — ideal for creating seamless indoor-outdoor transitions, especially in modern architectural settings.
Blade-to-Blade Sizing Explained
Louvre panel sizes increase in fixed increments based on blade orientation and size. These increments are measured from the first blade to the last blade and determine how the overall panel size increases as more blades are added.- Horizontal Blades (blades run side-to-side): The height of the panel increases in fixed steps. For example, with 160mm blades, the available panel heights might be 1616mm, 1766mm, 1916mm, and so on — each step adds one blade.
- Vertical Blades (blades run top-to-bottom): The width of the panel increases in fixed steps. For example, with 85mm blades, the panel widths might be 881mm, 961mm, 1041mm, etc., depending on the blade overlap and spacing.
Fixing to Brick or Concrete Walls
When fixing to brick or concrete, we use custom-made aluminium angles or brackets, secured with high-strength masonry anchors for a durable and stable installation. These components provide a solid mounting face for the louvre panels, whether you’re installing between walls, alongside a balcony, or in front of a window. On side walls, angles are typically used to create a flat surface for fixing the panels securely. As with any masonry fixing, it’s essential to ensure there is solid material behind rendered surfaces to achieve a reliable and long-lasting hold.Fixing to Timber-Framed Walls
When fixing to timber-framed walls, it’s essential that all brackets or angles are secured directly into the structural studs behind the cladding, not the cladding itself. Our standard aluminium fixing angles can be used, but the integrity of the installation depends on anchoring into solid framing. If stud positions don’t align with the bracket layout, additional noggins or internal framing may be required. It’s ideal to plan mounting points before cladding is installed, and heavy-duty timber screws should be used for a strong, secure connection. Installer Tip: If the timber framing is still exposed, it’s a great time to plan and measure the louvre layout early. Working out bracket positions ahead of time can save significant effort and cost later on. In many cases, it may be best to design the louvre size to suit the stud layout, rather than the other way around.GOOD TO KNOW
Frequently Asked Questions
What are sliding louvres?
Sliding louvres are aluminium louvre panels mounted on tracks, custom-made in our Sydney workshop. They let you move privacy, shade and airflow exactly where you need it — slide the panels aside for a view or access, slide them back for screening.
How does the sliding system work?
The louvres are mounted on a top-hung track, with a guide track at the bottom to keep the panels steady. You can have a single track or multiple tracks. Multiple tracks let you slide all the panels across to one side; a single longer track with fewer panels lets you slide them to wherever you like along its length. Either way the panels glide freely over decks, tiles or concrete.
Can I choose the blade type?
Yes — adjustable or fixed blades, in horizontal or vertical orientation, chosen to suit your sun control, privacy or airflow needs.
Where can sliding louvres be used?
Patios, balconies, breezeways, facades and full-height walls — every system is fabricated to your site’s exact needs.
How long will my sliding louvres take to make?
Every system is custom made — allow two to three weeks on average depending on the time of year. We work out the design with you, make them in our Sydney workshop, powder coat them, and they’re ready for delivery or pickup.
THE FINISH
Learn About Our Powder Coating
Every awning and louvre is powder coated before delivery — never painted on site. We use premium Dulux Duralloy® powders, the Australian architectural standard: a thick, uniform finish that resists chipping, fading and coastal weather far better than paint.
Six standard colours — no colour surcharge:
Satin Black
Pearl White
Monument
Woodland Grey
Shale Grey
Primrose
Prefer something different? Any colour from the full Dulux range can be matched — including every Colorbond®-matched tone.
Click here to learn more about powder coating →POWDER COAT COLOURS
Powder Coat Colour Charts
NOT QUITE THE RIGHT FIT?
Explore the Louvre Range
Not sure which louvre suits your project? Compare the full range of aluminium louvres we custom-make in Sydney — or get a quote and we’ll recommend the right fit.
Manufactured in Sydney and supplied direct – custom-made for every project, with no middlemen and no delays.